
I know, you’re probably thinking that all I do is redecorate all the rooms in our home… and you’re right, I do, it’s my toxic trait as all the cool kids say. But truly, the girls playroom decor needed a bit of an upgrade now that they’re older.
We initially did up the playroom decor when Maia was a baby and while it served it’s purpose beautifully, the way the girls play has now changed and so the play area needed to change with them. Builders came to the party to help us with this task and it was so great to get all the main bits and pieces at one store, and even get it delivered if I wanted to.

Before we dive into what we actually did, let’s chat about my vision for the upgraded playroom decor:
- Change up the wall vinyls and gallery wall to something more simple but still fun
- A work station for each of the girls where they can draw, build LEGO, do homework when they get there (next year for Aria!)
- A more streamlined storage solution. Initially the built in bench storage was great as the girls had quite a few toys that we would rotate, these days though we’ve noticed that they actually just play with the same toys over and over again and often mix them together in a game. I wanted a storage solution that could store everything neatly, still be accessible for the girls, be easy to clean up and also be aesthetically pleasing, tall order!
- A dedicated spot to read was also really important; our girls are massive bookworms and so I try to add reading spots where ever I can. The bookshelf next to their beds in their bedroom, some of their own books in the lounge and now I wanted to create a comfy and cozy spot in the play area for them to enjoy their books.
I browsed through the Builders website, particularly the decor category and found some solutions to everything that I wanted to get done. But before I could even begin with the exciting stuff, I needed to prep the space.
First I pulled off the vinyls. Pro tip: use a hairdryer to heat up the adhesive so that the vinyls literally peel off. I did the exact opposite and just ripped them off… along with pretty much all of the paint which was less than ideal. I also pulled out all of the nails in the wall that I had put in for the gallery wall.
Once I had basically wrecked the wall, it was time to patch. Luckily Bheki came to my rescue and did such a great job of patching all of the nail holes and the areas where I pulled off the paint. After letting it dry for a good 24 hours, I got to work with the sandpaper to make sure the wall was smooth. It’s really not difficult to sand down pollyfiller but it’s very messy, and very dusty. It didnt take me too long though and once the walls were smooth I made sure to vacuum them down and ensure there was no dust left on them as this would add a bit of unwanted texture to the wall once painted.
Finally it was time to get started on the first part of the play area upgrade; a new feature wall. After scrolling Pinterest relentlessly I decided on doing a scalloped wall, it was simple but still fun and my initial idea was to do it in a dusty pink colour… that all changed when I decided to take Aria with me to Builders to get the paint mixed and we walked out with a tin of Plascon’s Princess Purple. Truth be told I actually really love the colour and at the end of the day, it is the girls spot so I’m glad they have a colour on the wall that they truly love.
Onto the actual painting and I decided to enlist the help of my friend Sam to help me, plus it’s always lovely to have some good company. Painting the scalloped wall was actually suprisingly easy and it came out so so beautifully, almost a week later and I’m still obsessed with it! I did a whole reel on how to get this effect, you can give it a watch over here.
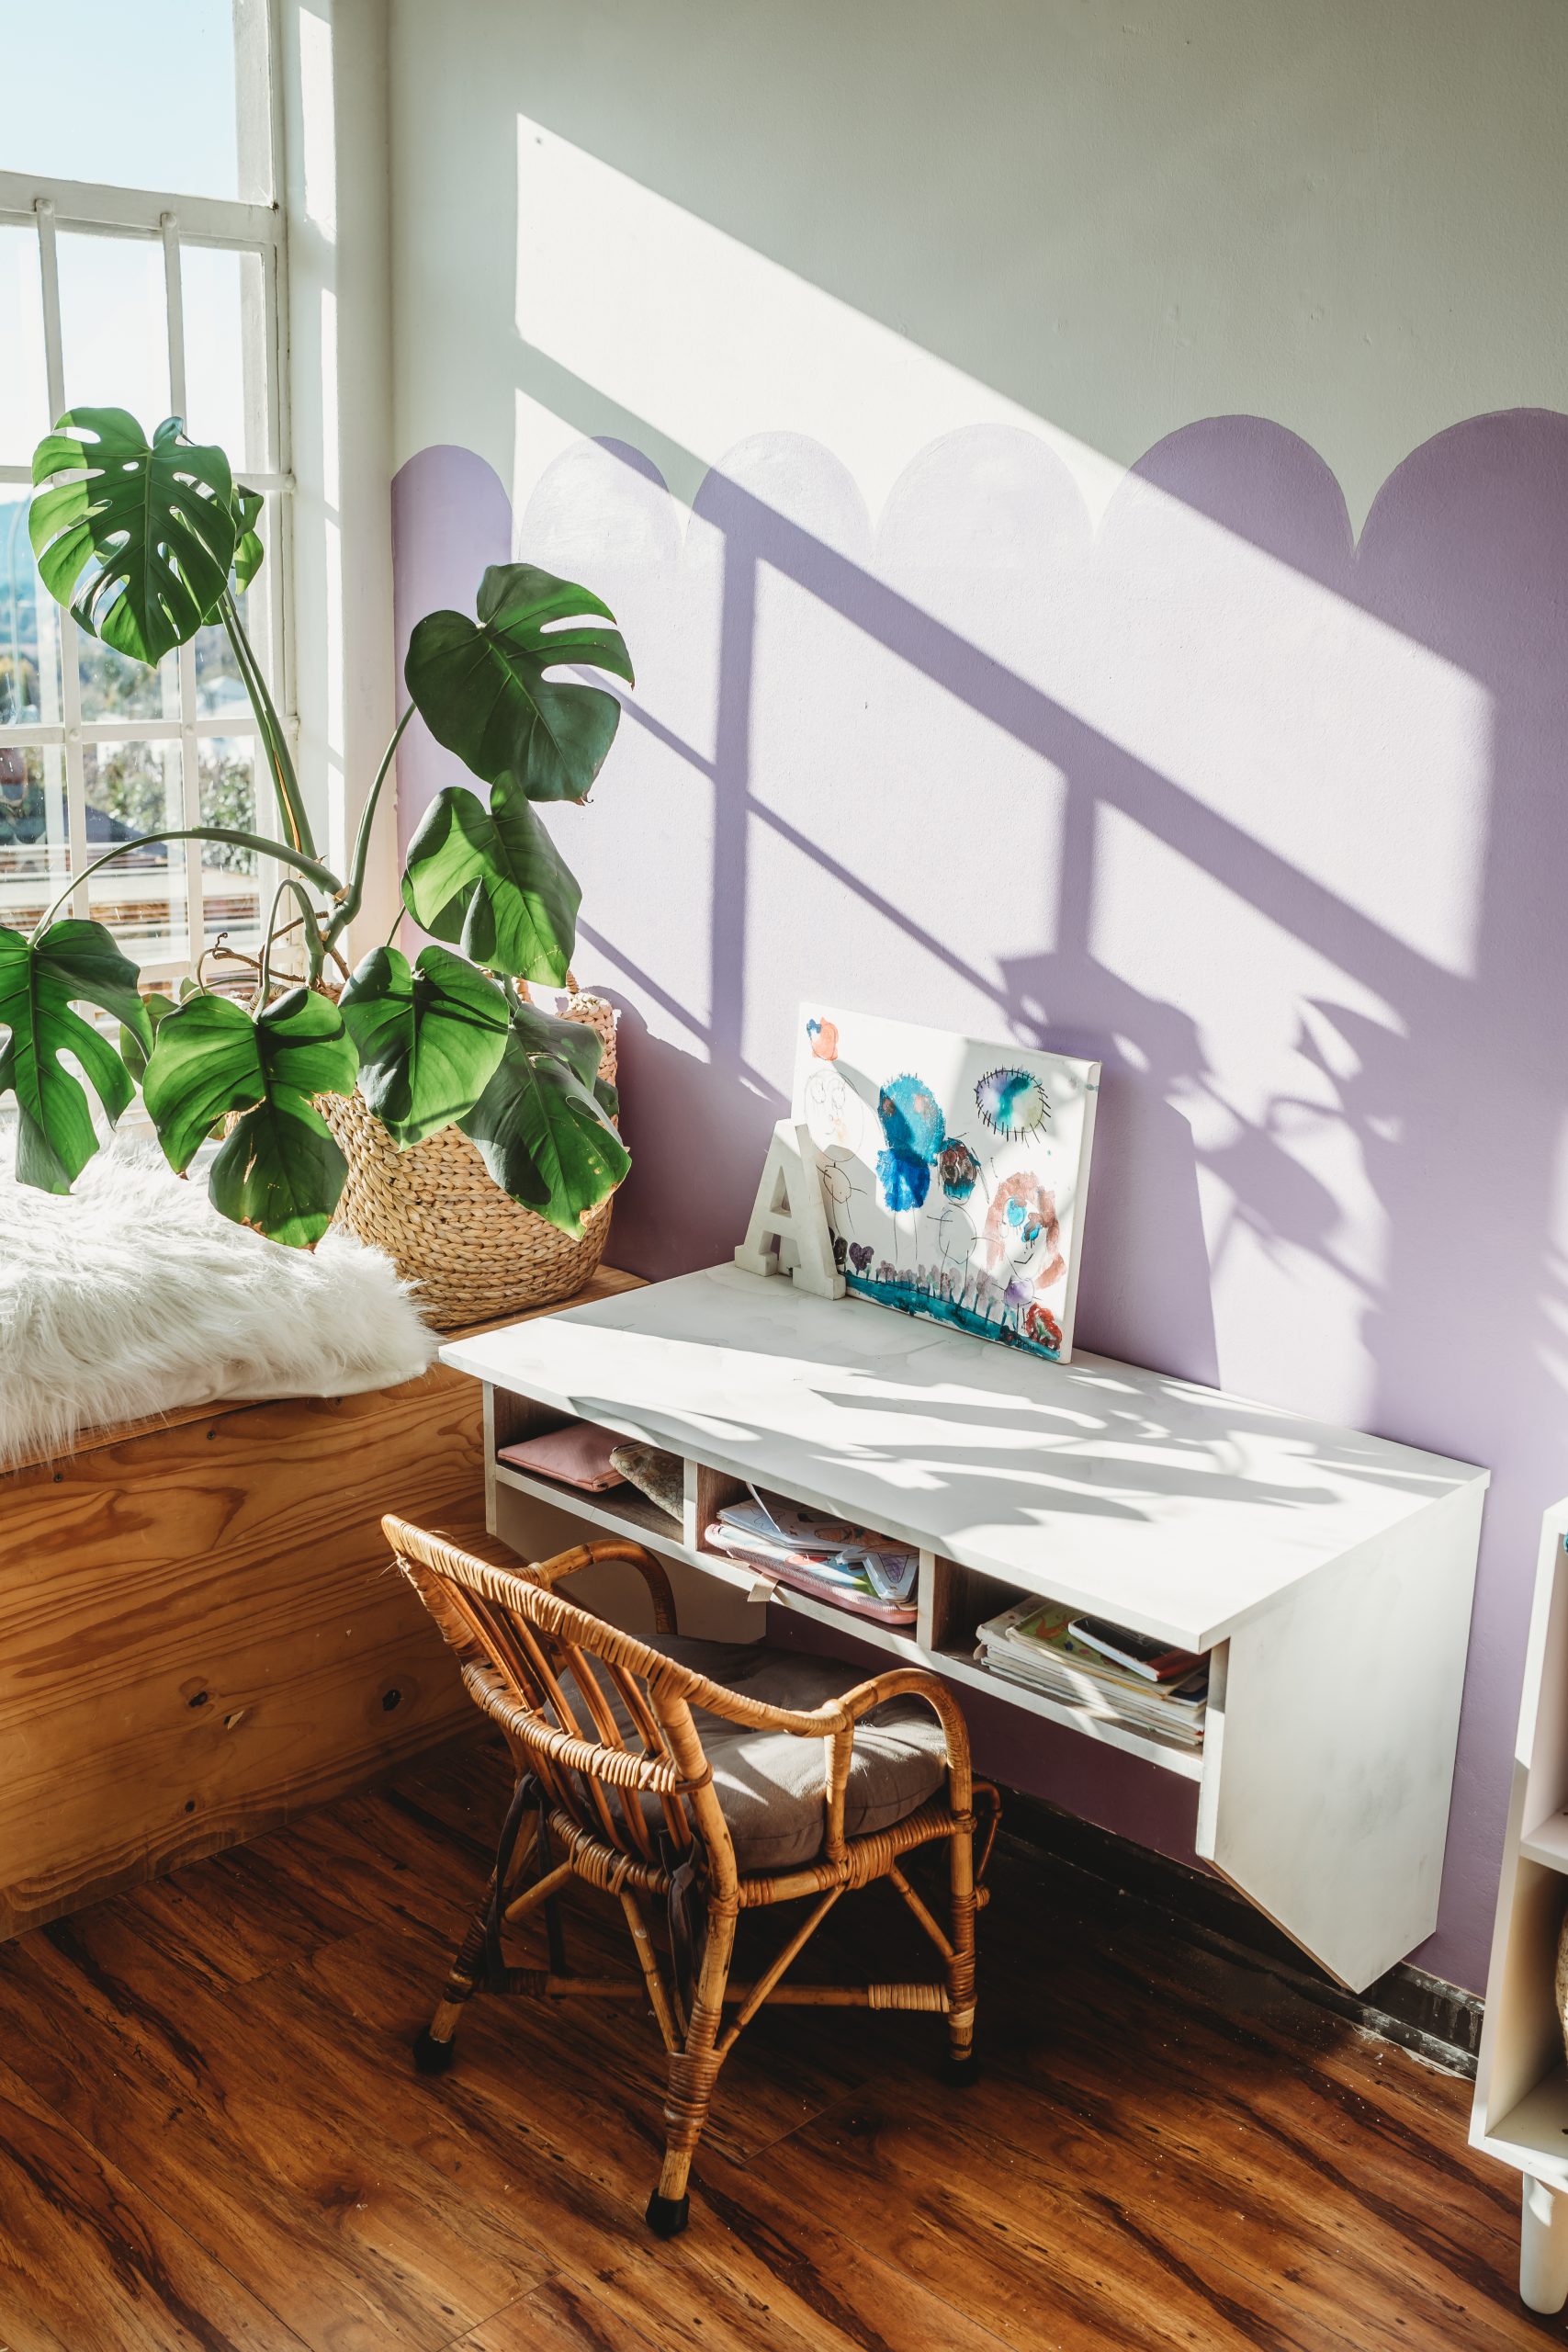
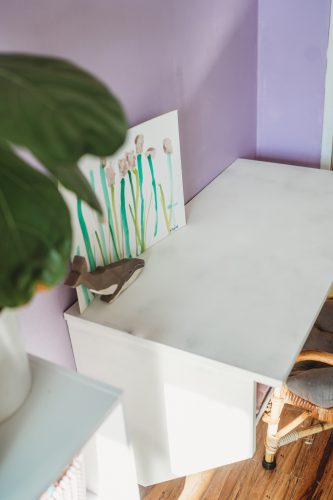
To tackle the workstations and storage solution I chose some flat packed furniture from Builders. Let’s start with the worksations. When I saw this wall desk, I just knew that they would work perfectly in our play area. I liked that we can attach them to the wall at a height that suits the girls, and when they grow taller and have different chairs, we can simply move them higher, basically they will grow with the girls. The other thing that I liked was the little storage holes, perfect for pencil bags, colouring books and paper, minimising the clutter on the actual desks. The only thing that I didn’t love was the colour, simply because the rest of the room is white and so this random wooden desk would look a little out of place. But with a little bit of primer and paint, they magically turned white and matched everything else perfectly! For chairs we used the two rattan chairs that we already had.
Workstations, tick! Next up, storage.

After a lot of Pinterest scrolling again, I settled on pigeon hole storage for a few reasons; it was compact, it was versatile and by adding some woven baskets it would match the aesthetic of the rest of the house (the play area is part of our open plan living area). I found these storage cubes and decided to get three and place them next to each other so that I had six holes. If you had more to store you could even add more on top of each other, it’s just so simple. Plus they were white so I didn’t have to paint them like I did the desks! While they looked great flat on the floor, I decided that I wanted them a little bit higher so Dan secured some wooden feet to them which made them look even more amazing! To store the toys in, I added three baskets to the bottom (one for LEGO and two for DUPLO) and then three pink plastic bins to the top (one for Barbies, one for Imagimags and one for My Little Ponies). I am thrilled with how this storage solution turned out, it holds all of the toys that the girls play with the most but still looks neat, tidy and stylish. Win, win, win!

Last but not least was the little reading nook that I wanted to create. This was pretty much just moving a few things around. We already had short ledge shelves on the wall next to the built in bench and all I did was actually fill it with books and add a long cushion onto the bench to make it more comfortable. The cushion is actually a little bit too short (it was previously on a cane chair) and so I added a lovely monstera plant onto the end of the bench, against the purple wall and it looks amazing, such a gorgeous contrast between the green and purple. With a few more scatters on the bench, the reading nook was complete and Aria (and I) have already spent a good few afternoons lazing in the sun, paging through a book over here.
I was so thrilled with how the upgraded play area looked by just adding a few key decor items, it was a completely new space and honestly didn’t take that much effort! All that was left was to pop in a few other decor bits like our wooden rainbow, plants, etc all of which we already had, you know I’m a big believer in repurposing what you have.
Our puzzles are still stored like this in the bookshelf next to the play area and then we have two more baskets in there too that basically store any odds and ends like plastic animals, toy food, etc. The dress up spot also stayed the same as it functions perfectly and didn’t need anymore streamlining.
All in all I am beyond happy with how we managed to change up the play area, it is beautiful, functional and the girls adore it. I hope that this blog post inspires you and shows you that giving a room a new lease on life doesn’t mean weeks of work, just a few simple tweaks can make all of the difference.


Looks great 🙂
I’m not sure if the pink text below the reading nook to the end is supposed to be clickable, but it isn’t. Just to let you know.